Oil lamp
I saw the metal bases of these lamps sitting to the side and waiting to be thrown away...I thought 'they'd be perfect for a project!' so I quickly saved them from the bin!
Machined metal objects like this, especially ones with a nice surface finish, tend be a dime a douzen in cheap mass market products. If you try and find someone selling just the bases however, you end up paying an arm and a leg for them. The original lamps cost around £10 when bought on sale a few years ago and were sold for outdoor use. Coming with an in-built battery and solar panels for recharging them. Everything about the bases of the lamps though is perfect for an LED lamp, from the metal construction to the ready drilled flange at the top of the base. Both perfect for heat dissipation and the mounting of a PCB.
Adding an LED + driver would be a piece of cake, but some kind of diffuser would be necessary for a finished product. I figured that an oil lamp chimney, sprayed with some glass frosting, would make for an ideal companion to the metal base.
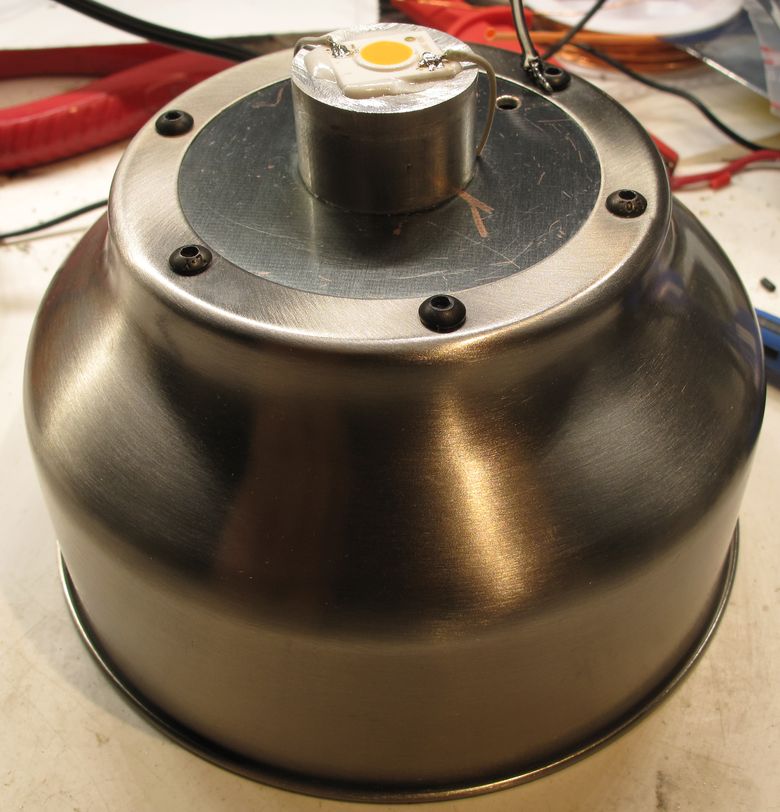
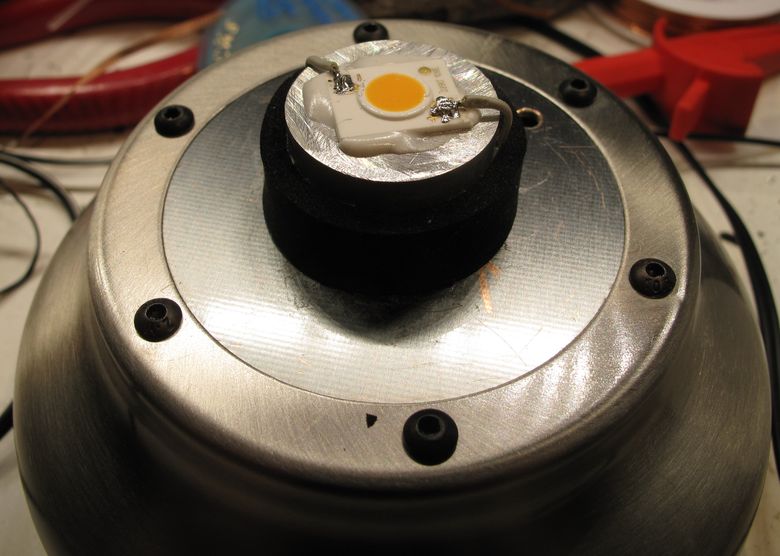
To illuminate the chinmey I'd need a relatively compact light source and one lifted up relative to a flat base too. To solve these problems I chose to go with a small CoB LED and a cynlinder of aluminium. Both of these can be seen above. The CoB being a 2200K LED from Lumileds with a CRI of 90. These produce a very attractive light for domestic use and suit the style of lamp well.
As can be seen the metal bases are rather attractive and considering the price of the original lights, a bit of a bargain.
As can be seen the metal bases are rather attractive and considering the price of the original lights, a bit of a bargain.
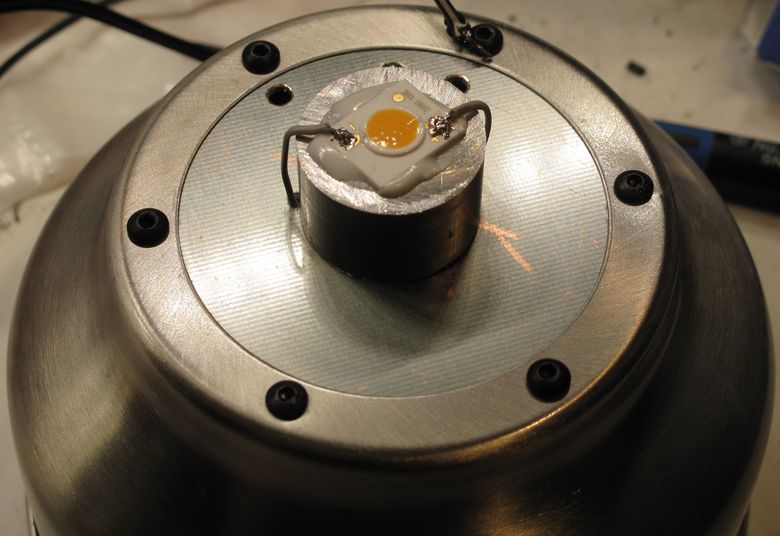
The next two images highlight how easily the bases accept a PCB. The top layer of the PCB being mated to the metal flange with a small amount of thermal grease to aid in heat dissipation.
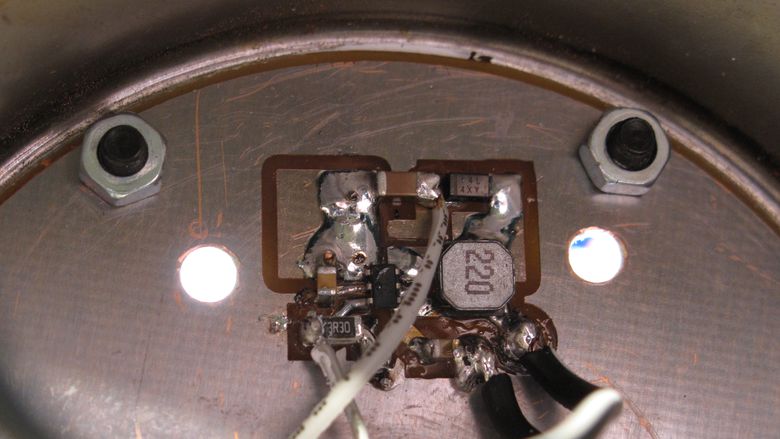
As to the LED driver I chose to go with a high performance part from TI, the TPS61165. Not quite as feature rich or efficient as the ZXLD1371, but cost effective, compact and extremely easy to use. One thing lacking in the TPS61165 is the ability to work from high voltages. It maxes out at a recommended operating max of 18V, just a couple of volts shy of what most laptop bricks put out. You really need a 12-15V wallwart to make the most of these. It's also only usable as a boost converter. The ever popular CoB LEDs tend to operate from fairly high voltages, so boost converters typically see more use then they used to.
As to the LED driver I chose to go with a high performance part from TI, the TPS61165. Not quite as feature rich or efficient as the ZXLD1371, but cost effective, compact and extremely easy to use. One thing lacking in the TPS61165 is the ability to work from high voltages. It maxes out at a recommended operating max of 18V, just a couple of volts shy of what most laptop bricks put out. You really need a 12-15V wallwart to make the most of these. It's also only usable as a boost converter. The ever popular CoB LEDs tend to operate from fairly high voltages, so boost converters typically see more use then they used to.
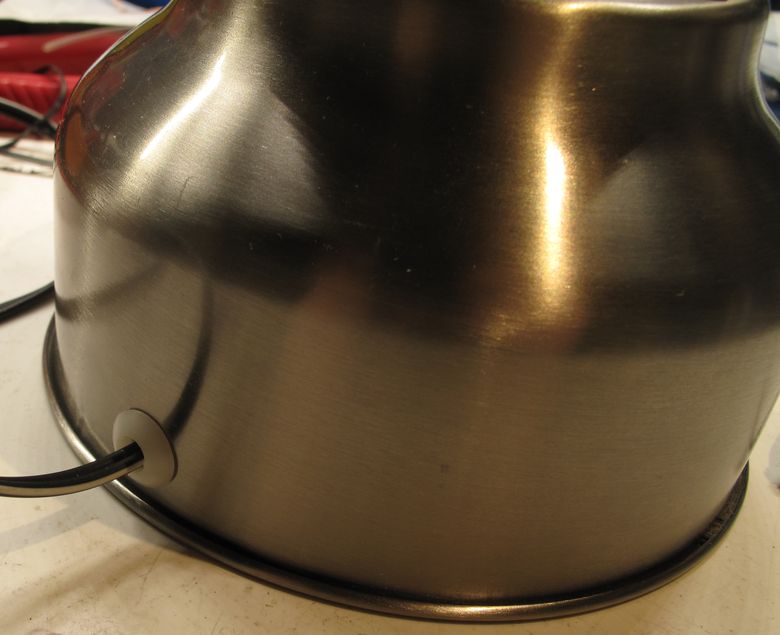
Above can be seen a rubber grommet that has been used to provide a safe hole through which the wire can pass. The metal is rather thin and once drilled, quite sharp.
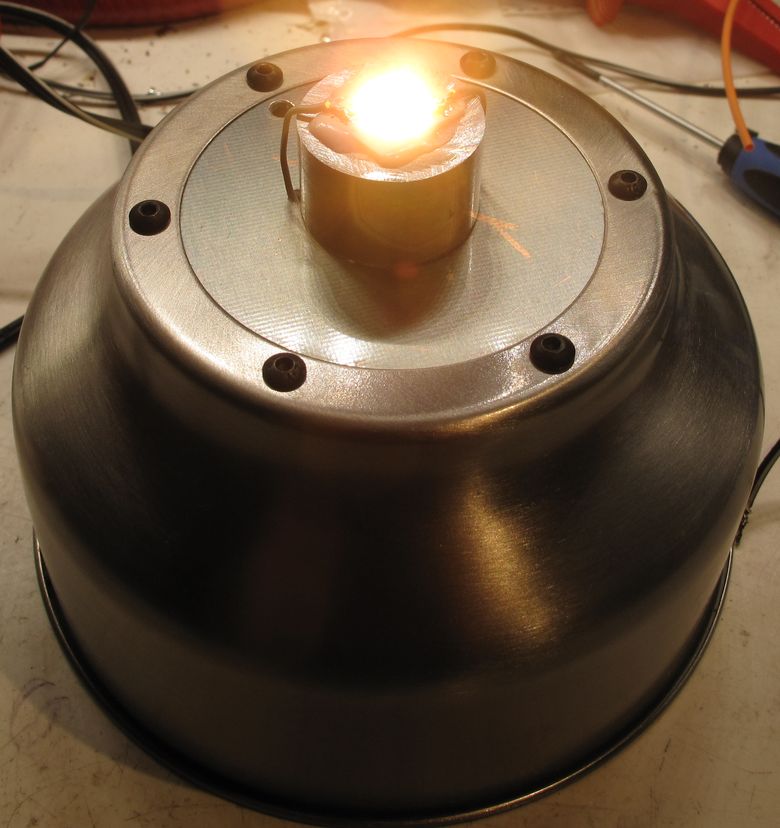
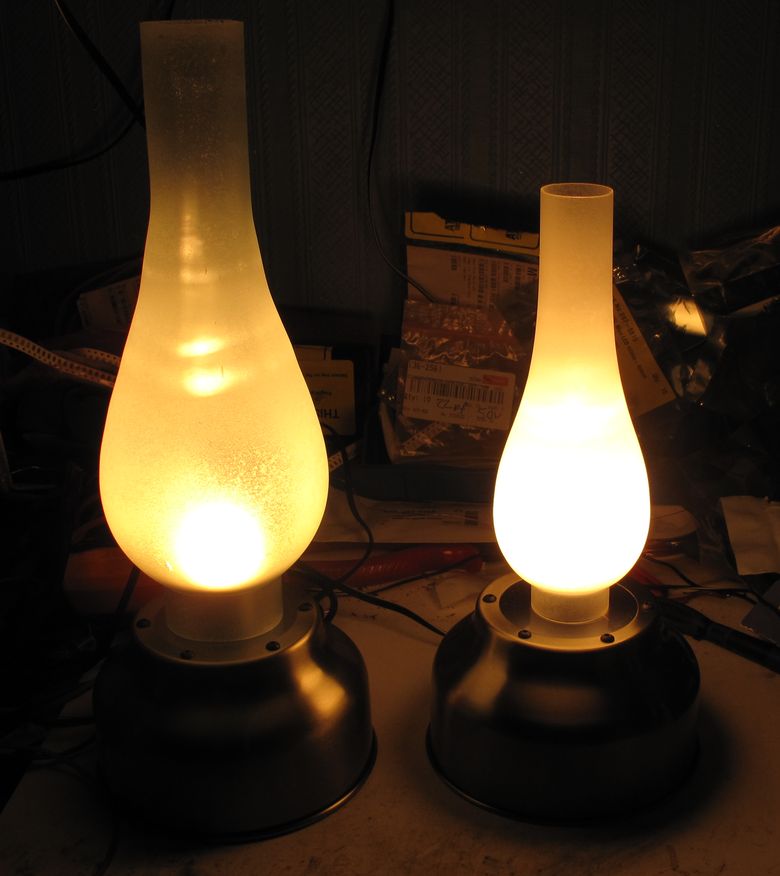
With the LED turned on!
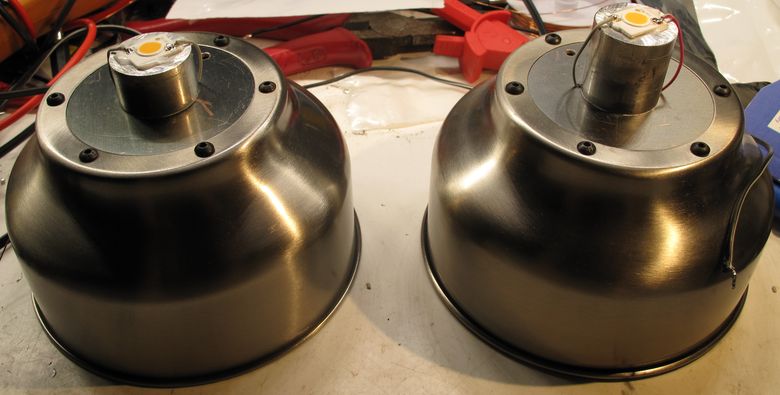
As I had two bases, two lamps were constructed.
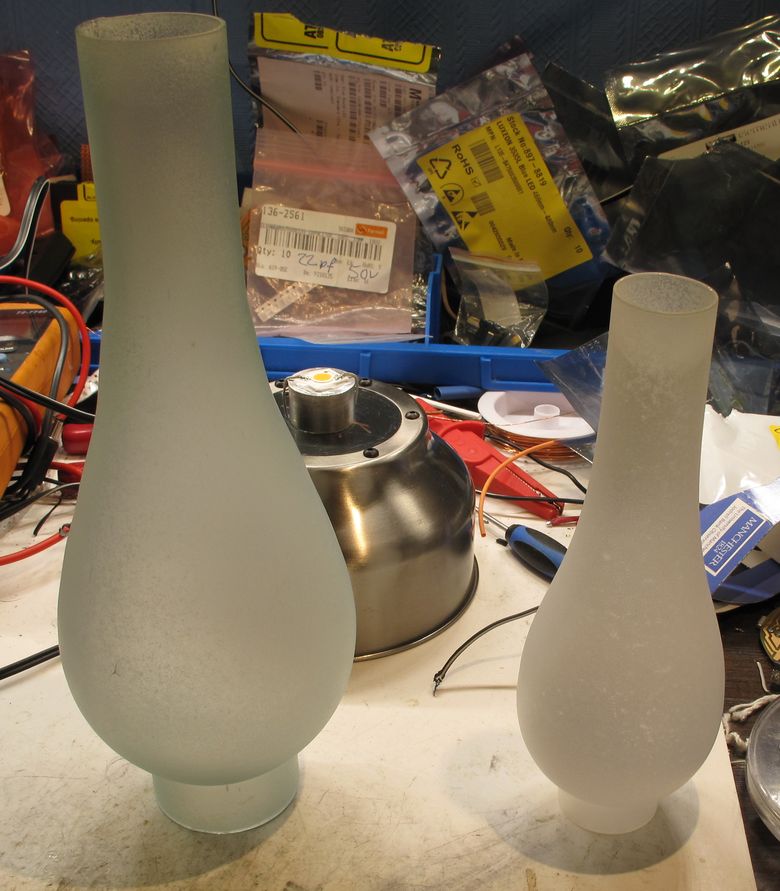
Here are the chimneys sprayed with the glass frosting.
To facilitate attaching the glass to the bases I wrapped some self adhesive, foam rubber, around the aluminium rod for a comfortable press fit. The pressure of the compressed foam holding the glass in place. It works surprisingly well.
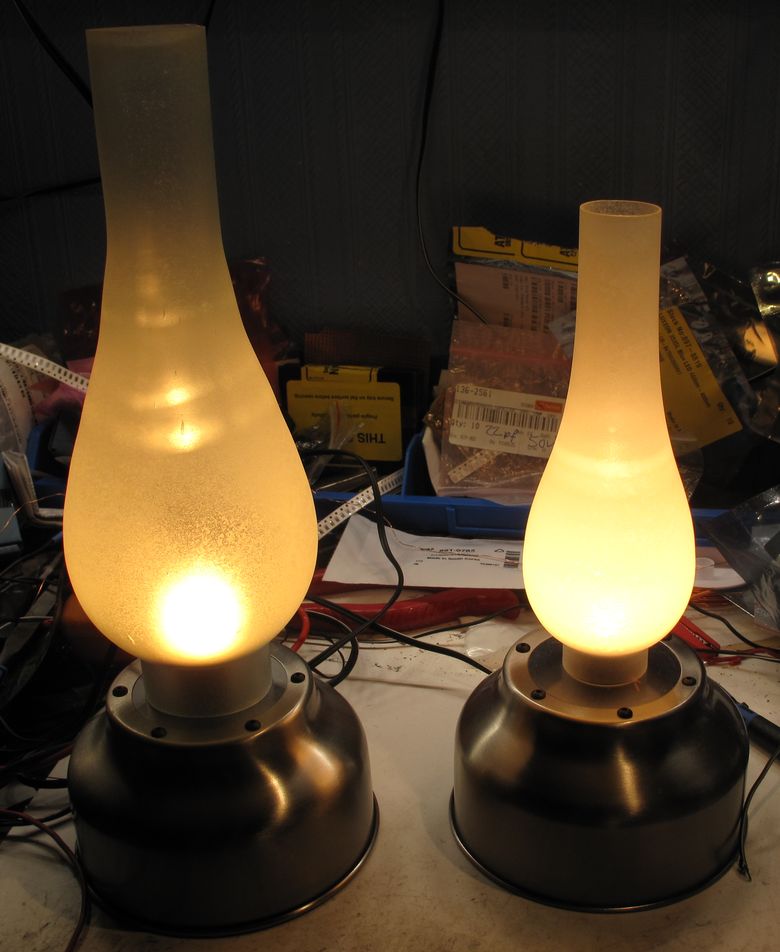
Here we have a slightly different view to the articles primary image, showing both finished lamps illuminated.
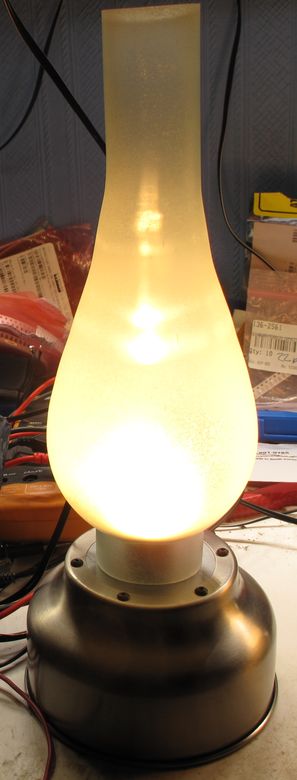
And here is another image of the larger lamp better illustrating the illuminated glass.
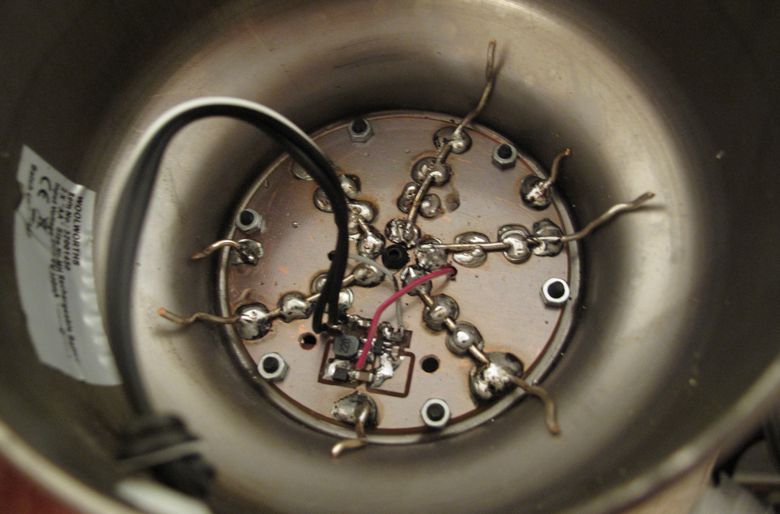
To help with cooling I decided to solder some strips of copper jewellers wire to the bottom of the PCB. The wire itself being 1.5mm in diameter and soldered in place using tin solder, rather than that containing lead, for its higher thermal conductivity. This technique worked surprisingly well with the measured LED temperature rise falling by around 15 degrees centigrade. I was expecting an improvement but not one this big.
All in all these lamps were a success and the family members whom I gifted them too were quite happy with them :)
All in all these lamps were a success and the family members whom I gifted them too were quite happy with them :)